Psomi - Sourdough bread project, from A to Z
For thousands of years, people used wild yeast cultures as starters to leaven their dough and bake their daily bread. These cultures are a mixture of wild yeast and bacteria such as lactobacilli- so named because they produce lactic acid which contributes to the sour flavor.
In the early 20th century, researchers selected and isolated single strains of yeasts that could leaven bread dough very quickly and this innovation made bread a suitable product for mass production. As if that wasn't enough, the baking industry has developed chemicals that can change the bread’s physical characteristics, characteristics such as texture, taste and appearance. Probably all that remains of the bread of yesteryear after all these refinements is just the name: bread.
I come from an agricultural community where we have always baked bread in traditional hand built clay ovens, like the one we have now for the restaurant.
If you would like to experience how a real natural bread tastes like and you are a bit patient, follow the steps described here, and a week from now you'll have your own sourdough loaf.
September 14th is the orthodox Holy Cross day, at which time during the service, branches of basil are given to everyone as a blessing. On that day my grandmother used to make a new sourdough (προζύμι) culture by mixing water and flour and placing the fresh basil branch on top of it. This little extra bit of holy chemistry always worked for her. I love the way tradition wraps simple things with a magical coat.
You can capture your own culture by simply exposing a mixture of flour and water to the air; the rest will be done by the wild yeast bacteria that live in the same environment we do.
Huge loaves in the traditional clay oven
Starting a culture :
100gr flour
100gr lukewarm water
In a litre sized glass jar (Its easier to check the progress through the glass add the water and flour and mix well. Leave it aside, either uncovered or covered with a cheese cloth, for 24 hours in a warm spot in your kitchen.
Every day mix the dough well and set aside again.
Every two days add 50gr of flour and 25gr of lukewarm water to feed your culture.
It depends on temperature, but within the first four days you will notice bubbles form on the surface of the dough. After a week your culture will be risen and look like the photo.
Storing your culture:
The culture is now fully active and can be used or refrigerated until needed.
During refrigeration, as the culture becomes semi dormant, a layer of clear tan or yellow fluid forms on the surface: it’s perfectly normal, and it should be stirred back in when the culture is used. You can refrigerate your culture for six months without feeding it, but if the culture has been in the refrigerator for about four months, it is a good idea to feed and warm it until it is fully active and then refrigerate it again. With proper care your culture can live forever! Many professional bakers all over the world, use the same culture for decades.
Making sourdough bread:
250gr culture-starter
250gr lukewarm water
500gr all purpose flour
1tsp salt
extra flour to dust the working surface
If you use culture that you stored in the fridge:
Let it come to room temperature, add 100gr of flour and 120gr of lukewarm water, cover with a towel and set it aside to proof (2-8 hours, depends on room temperature). After the culture has been fully activated and proofed, it’s time to make and proof the dough.
Pour the culture into a mixing bowl. Stir the water and salt into the culture with a spoon. Add the flour until the dough is too stiff to mix by hand. Turn out onto a floured board and knead in the remaining flour until the dough is smooth and satiny.
Or mix and knead all of the ingredients for a maximum of 20 minutes in a bread machine or a stand mixer equipped with bowl big enough to hold the amount of dough.
When kneading, if the dough is too dry or stiff, add more water. If it is too thin, add more flour.
Use a spatula to gently ease the dough out onto a floured board.
Flatten it slightly, then lift a portion from the periphery and pull it toward the center. Continue this around the dough mass to form a rough ball, then pat and pull into the loaf shape you desire.
Notice: if your culture is entirely used up, simply save a handful of this dough as a starter for the next batch.
Place the shaped loaf in a bread pan or, in a willow basket. Cover and proof either at room temperature for 2 to 4 hours until it has doubled in bulk or reached nearly to the top of the bread pan. Proofing at room temperature will yield good leavening and mild sourness.
Baking your sourdough bread:
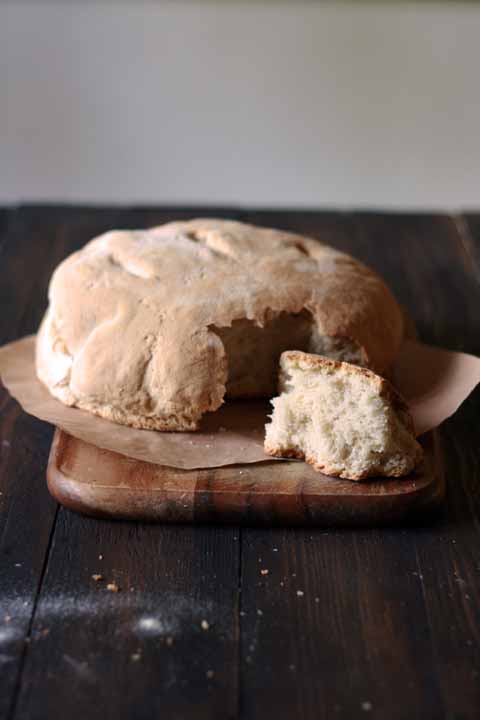
Just before putting the loaf in the oven, slash the surface of the dough several times with a razor blade or thin knife.. Place the pan with its shaped, proofed loaf in a cool oven, then turn the temperature to 200°C and bake for 70 minutes. When the loaf is baked, remove it from the pan and let cool on a wire rack for at least 15 to 20 minutes before slicing.


Comments
Post a Comment